12/19/2013

Christmas Wrapping


Are you getting as excited for Christmas as I am? There was a time where I really found it difficult to feel the festive love, but being Howard's girlfriend and a member of #teamhylda has forced me to embrace the season of mulled wine and silly jumpers with open arms. We've been getting into the party spirit sincewe put up our tree on the 1st December, but there is one annual Christmas shindig which always really confirms for me that Christmas is almost upon us.

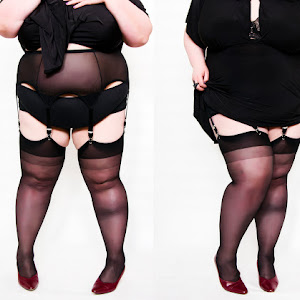
Every year my darling friend Lana Pillay throws a glittering Christmas party, with a beautiful tree, lots of bubbles and fascinating people . Being a showbiz starlet and celebrity make-up artist over at The Empress of Slap, I needed to make sure my outfit was right for the occasion so opted for my Lady V London dress and some slinky shapewear from Simply Be to keep everything in place!
Dress: Lady V London.
Underbust Bodyshaper: Magisculpt Retro Bodyshaper at Simply Be.
Tights: Simply Be.
Coat: Asos Curve.
Roses (in hair): Pearls & Swine.

The soggy weather certainly didn't dampen any Christmas spirits (and goodness knows, plenty of spirits and bubbles were consumed!)


I'd even attempted some tacky festive nails, using two Barry M varnishes (one of their red gellys and their snow like Christmas glitter which I'd previously wrote about here.)

I have one more deadline to hit before I can step up from mulled wine to ALL the gin, rum and Quality Streets and absolutely cannot wait. In the meantime, here's a festive message from the lovely Lana (and if you're in need of some Christmas party make-up tips, check out her YouTube channel here.)


Enjoy all those Christmas parties!

Until next time,

Diana xx

Follow me on InstagramFacebook and Twitter!
(All photos (c) Diana Thompson / Fashion Loves Photos. Please do not reproduce without written permission.) 

12/18/2013

Let Your Hair Down


One of the questions I get asked the most is how I get my hair to look the way it does. As someone who has hair which of a naturally frizzy texture, I have spent many years fighting against it with an assortment of tongs, straighteners and all manner of heated torture instruments.

It took until my late 20s to realise that I just needed to work with it. Despite being neither quite curly or straight, it was still versatile and held a style when properly set. With that in mind, I looked up lots of different ways to create soft waves which didn't require the damaging heat I'd constantly attack it with.

Pin curls became my hair saviour for a variety of reasons - they are easy to sleep in, can resemble a neat up-do when setting and take little more than a handful of bobby-pins. And as for the fringe, my trick is to roll it around a cut up bun doughnut and secure in place with more pins.

Beware - make-up-less  how to photos ahead!

What Do I Need?
 Freshly washed hair which is mostly air dry.
♥ Paddle Hair Brush.
 Hair serum.
 Hair Pins.
 Hair Spray.
 A hair doughnut cut open.

Make sure you're armed with lots of bobby pins to help keep the pin-curls in place.

Use a cut-up bun doughnut to create a faux-bang.

A little hair serum run over the ends before pining up will help reduce frizz when the curls are brushed out.
How Do I Pin-Curl My Hair?
1. Section off the front part of your hair which will later create your faux-bangs.

2. Take the doughnut and with your hair starting underneath, roll upwards towards your forehead.

3. Secure in place by pinning the ends into your hair with bobby pins.

4. Once secured, fan the hair out along the fringe so that it covered the entire doughnut.

5. For the pin curls themselves, take a section of hair and roll the ends around your fingers. The larger the section, the larger the wave created.

6. Carefully roll the hair back up towards your scalp, making sure that the ends are kept tucked in.

7. Pin the curl to your head. Cross over two pins in an x shape for maximum hold.

8. Continue this until all your hair is pinned up and spray with hairspray. Leave overnight or as long as possible
How Do I Tie A Headscarf?
Often I'll run to a shoot with my pin-curls happily concealed under a silk scarf as it keeps my hair out of my way and ensures that it'll be freshly brushed out if going somewhere afterwards. It's become a style which I choose to wear whilst running errands as no one need know it's functional rather than just a look you were going for. I'm always amazed by how many people compliment me on my "hair" when all they can see is my faux-bangs peeking out!

1. Take a large headscarf and fold it in two so that it becomes a triangle.

2. Place the "triangle over your entire head so that the longest ends are on your shoulders, and the shortest ends, your forehead.

3. Take the longest ends and bringing them upwards, tie into a knot. This should make the scarf feel tight and secure around your head.

4. Pick up the two shorter ends and pull one either side. In each hand, you should be holding one end each from the shorter and longer sides of the triangle.

5. Tie the ends into a bow and use a few hair grips to ensure the scarf stays in place.
6. If you feel inclined, add some sheer red lips and black eye-liner flicks to really go for that retro nod.
What Next?

When you take the curls out the next day, you'll find that you have something resembling ringlets in your hair. I always feel like some sort of screen siren at this point, although the reality is I look a bit more like a cocker spaniel!


There have been times where I've sprayed insane amounts of hairspray on them and let them be, but they will sadly drop very quickly especially if it's warm.

What I do next is take a large paddle brush and start to gently break through the curls. This is the point where I always panic as for a few minutes, you will see frizz. A lot of frizz. However, keep brushing again and again, and use your fingers or the brush pad itself to create the shape of the curls. After a few minutes if doing this, your hair will magically start to look like waves again and you can breath a sigh of relief!


When happy with it, rub a tiny bit more serum over your hair to smooth any fly-aways, and you are good to go!

I really hope that helped with how to do pin curls - please feel free to leave any questions in the comments if you're not sure about something.

Until next time,
Diana xx

Follow me on InstagramFacebook and Twitter!
(All photos (c) Diana Thompson / Fashion Loves Photos. Please do not reproduce without written permission.) 

12/16/2013

Fly Me To The Moon

I was so excited to finally get to wear my beautiful Baroque Flapper Dress from Simply Be last weekend whilst DJing at a lovely 1920s / art deco themed event.

Never have I wore an outfit which won so many compliments, with the exquisite beading really glinting underneath the lights in the evening. Sadly it was so cold that I had to start the night in my bolero and shrug but as things heated up, the layers came off and I was happy shimmying and shaking from behind the DJ decks. You can see how the dress looks without the layers of winter wear by clicking on my earlier post here.

Dress: Simply Be Baroque Flapper Dress (£75).
Beaded Headband: Primark (This was on elastic and designed to be worn over the forehead but I cut it off and pinned it into my hair instead.)
Moon Necklace: La Luna Necklace from Tatty Devine (£40).
Art Deco Ring: Tatty Devine.
Bolero: Gift from a friend.
Wool Cape: Vintage.
Tights: Simply Be (£16 for two pairs).
Boots: Primark
Black Beads: Beyond Retro. 

In the end, I opted for a 1920s roller set on my hair which made me feel like a completely different person. I was quite taken aback by how different I felt without my giant faux-Bettie bang at the front of my hair!


If you're looking for a dress to feel incredible in over the festive party season, then I cannot recommend the Baroque Flapper Dress enough. I am so grateful to Simply Be for saving my sartorial skin and sending it over! 

Until next time,
Diana xx

Follow me on InstagramFacebook and Twitter!
(All photos (c) Diana Thompson / Fashion Loves Photos. Please do not reproduce without written permission.) 

12/14/2013

Rockin' Robin

Christmas is very much in the air, with London being a veritable twinkle of fairy lights and mulled spices. We started celebrating early with the Christmas jumpers and decorations stepping out of hibernation from the 1st December!

Headscarf: Vintage.
Robin Cardigan: Primark.
Dog On Wheels Necklace: Tatty Devine (£30).
Boots: Primark.

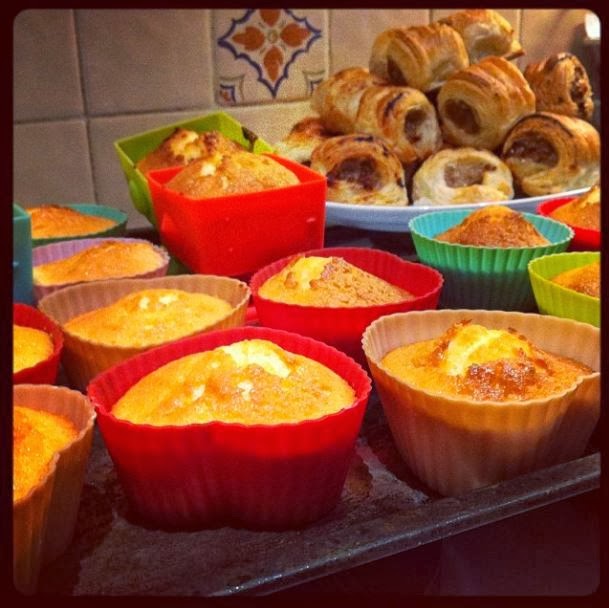
I had been DJing the night before, so Sunday 1st was the perfect lazy day for baking with a Christmas playlist blaring from the kitchen. Katie was the sausage roll queen whilst I whipped up a batch of vanilla cupcakes with a chocolate orange buttercream.


It was something of a practice run Christmas dinner - totally not just an excuse for a Sunday roast with crackers!


After dinner when we were able to move again, it was time for 3/4 of Team Hylda to decorate our tiny tree. What we lacked in glamour and glitz, we made up for in old Halloween decoration and utter tat! I think if ever there was a photo to sum up the guys in Team Hylda, this is it!


The only thing missing was the amazing Die Hard Christmas tee which I'd ordered as an early Christmas gift for Howard. It turned up a few days later from Dark Bunny Tees.

As you can see, it's pretty amazing! Sadly it's no longer available, but the website has a whole lot of other equally brilliant designs.

Hope you are all starting to feel the festive spirit!

Until next time,
Diana xx

Follow me on InstagramFacebook and Twitter!
(All photos (c) Diana Thompson / Fashion Loves Photos. Please do not reproduce without written permission.) 

12/05/2013

All I Want For Christmas


It's all a little hectic over here in FLP Towers, and I'm trying to get on top of my insane editing pile. Sadly this means that things are a little quiet on the blog, but I've got several posts lined up which I cannot wait to get written and published. In the meantime, please feel free to follow the links below to stay connected

Until next time,
Diana xx

Follow me on InstagramFacebook and Twitter!

Latest Instagrams

© diana@fashionlovesphotos.com. Design by FCD.